Home

Tuesday, November 26, 2013

Green Beans and Mushrooms Braised in Cream


Who loves green bean casserole? If you answered 'Me!', this recipe is for you!
When you have a fabulous main course roasting in the oven, this recipe is a perfect accompaniment. It's made on the stove top and can be timed so it's ready when your main course is ready.
I found this recipe while looking for vegetarian dishes to serve our guests that we invited to dinner. It was well received, and our guests asked for a copy of the recipe. So here it is!

'Braised' means cooked or steamed with a flavorful broth or cream. This recipe uses all fresh ingredients, nothing canned. So it's a bit of a departure if you're used to the canned green beans and cream of mushroom soup topped with french fried onions. This is definitely a recipe in which you must prepare/measure out all ingredients before you begin. If not, you may end up with burnt or over cooked elements (or both).
It's fairly simple in that you make your own french fried shallots~ a nice change from the traditional onion. They are mellow and more sweet in flavor, especially when fried in this manner.
After setting aside your garnish of shallots, you'll cook/steam the green beans and mushrooms in cream, a little lemon juice, minced thyme, salt and pepper. The beauty of this recipe really is the simplicity of it all :0)
I hope you enjoy Green Beans and Mushrooms Braised in Cream as much as my family and I do.

Green Beans and Mushrooms Braised in Cream

by The Goldilocks Kitchen
Prep Time: 25 minutes
Cook Time: 35 minutes
Keywords: side vegetarian
Ingredients (6 servings)
  • 2 tablespoons unsalted butter
  • 1 tablespoon olive oil
  • 3 medium shallots, peeled and sliced thin crosswise
  • 1/2 pound domestic mushrooms, wiped clean, sliced thin
  • 2/3 cup heavy cream
  • 2 teaspoons lemon juice
  • 1 1/2 teaspoons fresh minced thyme
Instructions
1. Heat butter and olive oil over medium heat in a large saute pan. When the oil and butter is hot, add in the shallots and saute until golden brown, about 7 minutes. Transfer to a paper towel lined plate with a slotted spoon.
2. In the same pan, add mushrooms, green beans, cream, lemon juice and thyme. Bring to a boil and cover; reduce heat to low and simmer, stirring occasionally, until the beans are tender, about 15 to 20 minutes. Remove the cover, and simmer for a few minutes to thicken the cream if necessary. Transfer to a serving bowl and garnish with the fried shallots. Serve warm.
Powered by Recipage

Friday, November 22, 2013

Chocolate Pecan Pie

This Recipe for easy southern chocolate pecan pie is the best homemade dessert for any party or holiday celebration! A classic with a chocolate twist. Because everything is better with chocolate. Top with caramel flavored whipped cream for the perfect garnish!

Holiday pie made from scratch? There is rarely a thing in the world more delicious or rewarding!
I am the type of person who feels chocolate can make anything better, especially pie :0) Adding chocolate to Pecan pie just takes it to a whole new level! Plus a dollop of Caramel whipped cream on top puts this pie over the top. (See recipe below.) It's the perfect complementary flavor for the pecans and the caramel matrix in which they lay.
This Recipe for easy southern chocolate pecan pie is the best homemade dessert for any party or holiday celebration! A classic with a chocolate twist. Because everything is better with chocolate. Top with caramel flavored whipped cream for the perfect garnish!

I will never forget the first time I had a slice of Pecan pie. It was just after I had moved to Kingston, Ontario Canada. Some friends of mine had me over for a lovely dinner. Afterwards, I was offered a piece of pee-can pie.
"What's that?" I said.
My friend stared at me for a moment with eyebrows raised.
"You've never heard of pee-can pie before?!"
"No, I really haven't. I'm thinking it must be a Canadian dish?"
"I'm pretty sure people from the states eat it too...here, try it."
She place a slice of Pecan pie on my plate. Boy I felt stupid then!
"Oh!" I said. "Pecan pie! I was totally confused~ you guys just pronounce it differently here, ha ha, My bad."
I was mentally kicking myself the rest of the evening; feeling so stupid for not picking up on that! And I guess some in 'the states' pronounce it that way too :0) Even as I ate the pie that night, I decided I wasn't a huge fan of Pecan pie. I've just never been one to love nuts in my food. (Unless it's chocolate cashew or peanut clusters, I love them! See there's that whole adding chocolate to stuff makes it better thing :0)

This Recipe for easy southern chocolate pecan pie is the best homemade dessert for any party or holiday celebration! A classic with a chocolate twist. Because everything is better with chocolate. Top with caramel flavored whipped cream for the perfect garnish!

Anyway, I naturally gravitate towards the chocolate pies during the holidays or whenever I have a choice of pie. So when I was watching an episode of Cake Boss on Netflix and saw them making Chocolate Pecan Pie (among other pies), my curiosity was piqued. I'd never herd of chocolate pecan pie before. I had to try it! And there, in one of my baking books I found a recipe for it. Bada-bing, bada-bang, bada-boom! After I tasted the first bite I wanted more and more!

I also think I enjoyed this pie so much because the pecans are roasted in the oven, softening them a bit and adding a new dimension of flavor. They are also chopped, which texture I preferred to whole nuts. Plus, adding in three different types of chocolate, semi-sweet, milk and white really was a delight for my taste buds. An important note: an instant read thermometer is essential to creating this pie. If you don't have one, see if you can borrow one from a friend!

Want to know a great trick for creating a gourmet pie? Flavor your whipped cream topping! Yes, a simple but delightful addition of flavored whipped cream can complement just about any pie. I love Caramel flavored Whipped Cream on my Pumpkin and Pecan pie. Whip it up just before you are ready to serve your slices. Find the recipe following the one below for Chocolate Pecan pie.


Chocolate Pecan Pie

by The Goldilocks Kitchen
Prep Time: 30 minutes
Cook Time: 55 to 65 minutes
Ingredients (8 to 10 servings)
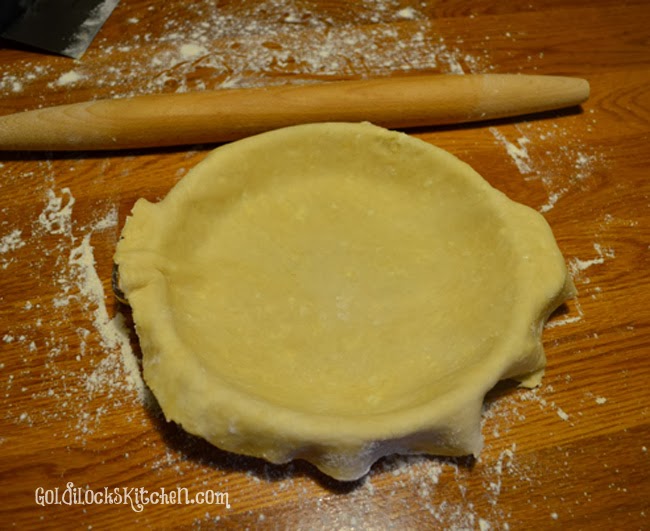
  • 1 recipe for prebaked Pie Shell
  • 1/3 cup of semi-sweet chocolate chips
  • 1/3 cup of milk chocolate chips
  • 1/3 cup of white chocolate chips
  • 3 tablespoons unsalted butter, cut into 1 inch pieces
  • 3/4 cup packed dark brown sugar
  • 2 large eggs
  • 1/2 cup light corn syrup
  • 1 teaspoon vanilla
  • 1 cup pecans, toasted and chopped into small pieces
Instructions
1. While preheating your oven to bake the pie shell, roast the whole pecans on a rimmed baking sheet for about 5 to 7 minutes. Watch carefully so they don't burn and stir them every couple minutes. Chop them up when they have cooled sufficiently.
2. Follow the directions for partially baking the pie crust. Melt the butter in the bowl of your stand mixer by placing it in a pot of water set over medium low heat. The water should not simmer.
3. Remove the bowl when the butter is completely melted and mix in the sugar and salt with a wooden spoon. Stir until all the butter is absorbed. Attach the bowl to the stand mixer. With the whisk attachment, beat in the eggs, then corn syrup and vanilla.
4. Return the bowl to the pot of hot water and stir the mixture until it reaches 130 degrees on an instant read thermometer. This can take anywhere from 10 to 15 minutes. (The mixture should be shiny and hot.) Remove from the heat and stir in the toasted chopped pecans.
5. When the pie shell comes out of the oven, pour the pecan mixture into the pie shell. Sprinkle the chocolate chips over the pie filling and use the back of a spoon to push them down into the filling. Adjust the oven temperature to 275 degrees and move an oven rack to the middle position. Bake the pie for 55 to 65 minutes, when the filling is set but soft when pressed with the back of a spoon. Transfer to a wire rack to cool for 4 hours.
Powered by Recipage


Caramel Whipped Cream

by The Goldilocks Kitchen
Prep Time: 5 minutes
Cook Time: about 3 to 5 minutes
Ingredients (8 servings)
  • 1 1/3 cup whipped cream
  • 1 tablespoon brown sugar
  • 1 tablespoon of Torani Caramel syrup or other flavor or liquor of your choice
Instructions
1. Chill bowl and beater(s) in a freezer for about 10 minutes. Add all ingredients into the bowl and whip at low speed for about 30 seconds, or until the mixture gets frothly with bubbles. Increase the speed to medium for another 30 seconds. Then turn the speed to high and whip until the cream is nearly doubled in volume, smooth, thick, and soft peaks form when you remove the beaters or whisk, about 1 to 2 minutes. (Soft peaks are when the point of the peak falls over and touches the whipped cream. A stiff peak will stand up strait.)
Powered by Recipage

Monday, November 18, 2013

Lamb Stew with Dried Plums


This recipe for Lamb Stew with Dried Plums is perfect for your Catching Fire premiere party! It feeds 8 to 10 people and will smell so good while it simmers on your stove top. It certainly will be the most rich and decadent stew you've ever tasted; everything representing the capitol of Panem.  It's relatively simple to make, packs incredible flavor, and will become your favorite stew too, just like Katniss!

A word on purchasing Lamb:
I'll get strait to the point, it's not the cheapest on the pocket book.
But as soon as you take your first bite you'll see why Lamb is expensive. It's dang good! So tender and juicy! The recipe calls for Lamb fillet, which can be difficult to find and is $$. If fillet isn't available, you'll have to purchase bone-in leg or shoulder/neck pieces, which are usually priced less. Plan on spending some time cutting the meat away from the bone, in addition to the listed preparation time.

Lamb searing in the dutch oven before being slow cooked on the stove top.
I love all the beautiful color!


The Lamb chunks are tossed in seasoned flour and seared to lock in the juices and create more flavor. The lamb is then slow cooked in beef stock for an hour and a half. Then you'll just add all the additional ingredients and simmer for about 30 minutes longer. I love the color of all the veggies and the plums together. Ding! It's done :0) It comes out just right every time.

If you're a fan of the Hunger Games (like me) this meal is a real treat. I hope you enjoy watching and reading. And may the odds be ever in your flavor!


Lamb Stew with Dried Plums

by The Goldilocks Kitchen
Prep Time: 40 minutes
Cook Time: 2 hours
Keywords: roast
Ingredients (8 to 10 servings)
  • 4 lbs. of lamb fillet, shoulder or leg, cut into 1" pieces
  • 2 teaspoons salt
  • 1/2 teaspoon ground black pepper
  • 1/2 cup all-purpose flour
  • 2 tablespoons olive oil
  • 3 cloves of garlic, minced or pressed
  • 1 large onion, diced
  • 4 1/2 cups beef broth
  • 2 tablespoons white sugar
  • 3 tablespoons brown sugar
  • 3 cups diced carrots
  • 1 cup diced zucchini
  • 1 1/2 cups diced celery
  • 3 potatoes, cubed into 1" pieces
  • 3 cups dried plums (prunes)
  • 2 teaspoons dried thyme
  • 3 teaspoons minced fresh rosemary
  • 2 teaspoons minced fresh basil
  • 2 bay leaves
  • 1 cup ginger ale
  • 1 teaspoon minced fresh Italian parsley
Instructions
1. In a large mixing bowl, place flour, salt and pepper and briefly whisk together. In a large stove top dutch oven, add the olive oil and set the burner to medium heat. Place the pieces of lamb into the mixing bowl with the flour and toss to coat evenly.
2. When the oil is shimmering, pour in one half of the lamb pieces and saute until nice and brown on the outside, about 5 minutes. Remove onto a plate and cover with foil. Repeat with the remaining lamb pieces.
2. Add the onion to the pot and saute until the onion softens and starts to turn golden. Add the garlic and cook for about 30 seconds. Pour in 1/2 cup of beef stock and scrape up all the brown bits off the bottom of the pan. This is called fond and it's terrific for adding flavor. Cook for about 5 minutes more to reduce the stock. Pour in the remaining beef stock and add the lamb and any accumulated juices back into the pot. Stir in the sugars. Bring the mixture to a boil, reduce to low, and cover. Simmer for 1 and 1/2 hours.
3. Add the vegetables, dried plums, herbs, and ginger ale to the pot. Simmer for 30-40 minutes, until the meat and veggies pierce easily with a fork. Dish up and serve.
Powered by Recipage

Saturday, November 16, 2013

Foolproof Pie Dough


If you have ever made a pie from scratch you know how difficult pie crust dough is to work with. Learning how to work with pastry dough is so important to some, they pay a lot of money to become certified Pastry Chefs. Working with pastry dough can really take some know how. I have in the past, personally tried TWO different 'No Fail' pie dough recipes; apparently they didn't factor me in when they named the recipes. They should have been named "No Fail pie crust except for Emily". Every time a disaster! I was scared off of pie baking for a long time. Then, I found this little miracle of science, "Foolproof Pie Dough" that even I can make!

This recipe's success relies heavily on one key ingredient. Vodka.
Yep, that's right, alcohol. Or more accurately, ethanol.
It turns out Vodka has a high percentage of ethanol (40%), and that's why it's used in this pie dough. And NO, it's not for taste! In fact, it imparts zero flavor into the crust because the alcohol evaporates in the oven. This recipe is all about the chemistry. Have a desire to be enlightened? Then read on!

The Rolling and placing process of pie dough:

You will need: one refrigerated pie dough disk,
a long rolling pin, flour, and your pie plate (obviously).
And you'll need to work quickly so the dough will not get warm. If it
doesn't stay cold, it will get sticky.

This dough is more moist and supple than others, and I suggest
flouring your work surface with at least 2 tablespoons of flour. Roll out
the dough to no thinner than 1/8 inch. It should be about 12" in diameter.
Now roll the dough onto your rolling pin, and unroll it over your pie plate.
( My bench scraper comes in handy in case the dough sticks a bit to the surface.)

Using kitchen scissors, trim the excess dough that is hanging longer
than 1/2 inch over the sides.

Fold or tuck that 1/2 inch overhang of pie dough under itself, making the
end of the dough flush with the edge of the pie plate. You can smoosh it
together gently.

Lastly, use your fingers as shown to create a decorative edging.
Some folks use the tines of a fork to smoosh the dough around the edges,
Whatever you personally prefer! Now the dough is ready to be
 refrigerated and then baked!
FYI: You will need a food processor for this recipe :0)
Gluten (the protein chains that holds dough together) forms readily in water. Too much gluten will make the dough tight, causing it to be difficult to roll out.The more you knead the dough the more gluten forms. Most pie dough recipes are stingy with the water for this very reason, and the dough can often turn out dry and fall apart. But gluten can't form in ethanol. So we can add more moisture to the dough, making it moist and definitely easier to work with. (No ripping!)
Take note: This dough takes a bit longer in the oven to bake than traditional dough as there is more moisture to evaporate.
Recipe step by step photographs
The "cottage cheese curd" stage after adding butter and shortening.
Dough processed with the last 1/2 cup flour. It should have lots of small clumps.
Dough with the water and vodka incorporated into it. See how sticky it is?
The final disc wrapped in plastic ready to be refrigerated until firm.

This dough will bake up just as tender, sweet and flaky as any pastry dough, and you'd never know the difference. As long as you follow the recipe, this dough will be just right every time!

Foolproof Pie Dough

by The Goldilocks Kitchen
Prep Time: 10 min.
Cook Time: 35 minutes
Keywords: bake dessert pie
Ingredients (1 single crust pie dough)
  • 1 1/4 cups of unbleached all-purpose flour, plus extra for the work surface
  • 1 tablespoon of sugar
  • 1/2 teaspoon salt
  • 6 tablespoons (3/4 stick) unsalted butter, cut into 1/4 inch cubes and chilled
  • 1/4 cup of shortening, cut into 2 pieces and chilled
  • 2 tablespoons cold vodka
  • 2 tablespoons cold water
Instructions
1. In a food processor, add 3/4 cup flour, the sugar and salt. Pulse a few times to mix together. Now add the butter and shortening and process strait for about 10 seconds. You should see a few large and small clumps of dough (It resembles cottage cheese curds). No dry flour should remain. With a spatula, scrape down the dough and spread it evenly around the food processor. Sprinkle the remaining 1/2 cup of four over the dough and pulse 6 times. Empty the contents into a medium mixing bowl.
2. Pour the cold vodka and water over the dough and fold it in with a rubber spatula to thoroughly mix it in. It should be somewhat sticky. If it's really wet, sprinkle on more flour and hand knead it in on a lightly floured surface until the dough is manageable. You can knead and work this dough till the cows come home and it will never get stiff like regular pie dough. Lay out some plastic wrap, pick up the dough in your hands and mold it into a flat disk about 4" wide. Wrap it in plastic wrap and refrigerate it for at least an hour. Pull it out of the fridge and let it sit at room temperature for about 10 minutes before rolling it out. Can be refrigerated for up to two days.
3. After rolling and placing the dough in your pie plate, poke the bottom of the crust a few times with the tines of a fork. Cover the pie plate with plastic wrap and chill the dough again for at least 30 minutes before baking. When ready to bake, line the dough with a layer of aluminum foil and add pie weights or pennies. If you only have beans or rice to use as weights, make sure you fill your pie to the very top with them; they're not as heavy as standard weights. Cover a rimmed baking sheet with a sheet of aluminum foil, set the pie filled with weights on it, and place on the bottom rack of the oven. Bake at 400 degrees for 25-30 minutes. Remove the pie from the oven. If you only need a 'partially baked pie crust' then stop here. If you need it completely baked through, remove the weights, rotate the baking sheet, and continue to bake until the crust is light golden brown, about 5 to 10 minutes more.
Powered by Recipage

Friday, November 15, 2013

Pumpkin Pie From Scratch


Pumpkin pie. The iconic American holiday dessert. What more can be said about it that hasn't already been said?


Well, a lot! Have you ever tasted a store bought pumpkin pie? With it's soggy crust and grainy, overbearing one note flavor? Oh pumpkin pie, how you have fallen! This desert was once a light creamy custard with a crisp crust and a symphony of flavors harmonizing with the pumpkin puree. It's time to restore this quintessential holiday dessert back to it's former glory. It starts by creating your own at home in the kitchen. If you'd like to know how, read on!

Let's start with the crust.
You can purchase ready made single-crust pie dough, make your own favorite recipe. Better yet, try my favorite Foolproof Pie Crust.


I like to use a french style rolling pin for pie dough because it's long enough to roll up the pie dough and still have space on the ends. But any longer-style rolling-pin will do. Rolling the dough onto your pin and then rolling it out over the pie plate will help keep the dough from ripping. If you are using my Foolproof Pie Dough recipe, sprinkle at least two tablespoons of flour onto the surface where you will be rolling out the dough. It's more moist that traditional pie dough. I also make sure my rolling pin is dusted with flour to ensure that the dough won't stick. You'll need to work quickly, when the dough is pliable but still cold. If it warms too much it will become sticky even if you use a lot of flour.

Following the pictures, place your pie dough in the the plate and create a decorative edge. Set it in the fridge for 30 minutes while your oven is heating. You can move on to prepping the ingredients for the filling.

Slowly roll the pastry dough onto your rolling pin. A bench scraper comes in handy if the dough sticks to the surface.

Gently unroll the dough over the pie plate. There should be at least 1/2 inch over hang all around.
Trim any overhanging dough that is longer than 1/2 inch.

Tuck or fold the edge of the dough under 1/2 inch.

Create a decorative fluted edge all around with the index finger of one hand and
the thumb and index finger of your other hand, as shown.

In order to achieve a properly crunchy pie crust that will stay that way, the dough needs to be pre-baked while you're creating the filling. This way, the warm pie shell and hot filling you pour in will set the custard quickly and prevent it from soaking into the crust and making it soggy.

When you're pre-baking a pie shell, you must way the down the dough or it will dome up in the middle and shrink down the sides when it's baking in the oven.(In other words, turn into a disaster. Ask me how I know...) Some traditional methods suggest you use beans or rice. I would avoid these, as they don't conduct heat well and are not as heavy. Your best options for weight are pie weights (which you can find at most stores) or coins. Yes, that piggy bank full of pennies can be useful!


Cover the shell in foil, folding the edges over the pie plate. Place the weights inside and bake your crust according to the recipe. You'll want to remove the weights shortly before the pie crust is finished baking so the bottom can brown up a bit too.


Onto the Filling
For this recipe, once again there are some surprise secret ingredients that come to your aid. Pumpkin puree is cooked on the stove with candied yams. The yams (or sweet potatoes) complement the pumpkin well, tasting very similar but adding a depth of flavor. Why first cook the filling on the stove top? The heat will reduce the amount of liquid in the potato puree, concentrating the flavor. Also adding heat to the spices and fresh grated ginger will 'bloom' the flavor of these ingredients, building more complex flavors to complement the pumpkin.


When your pie shell and stove top cooking are done (hopefully around the same time), the pumpkin mash is mixed thoroughly with a custard base and strained through a fine mesh strainer. Pour the strained liquid filling directly into the warm pie shell and bake! Ooh la la, you have just baked a pumpkin pie from scratch! Note that you'll remove the pie when the center is still jiggly. The residual heat will finish cooking the pie through.

I can't eat pumpkin pie without a good sized dollop of whipped cream. Chocolate curls don't hurt for a lovely garnish either. Why not serve a special whipped cream on top of a special pie? Mixing in a bit of brandy or my personal favorite, Torani Caramel flavoring syrup, can be a very tasty top note garnish to a pumpkin or pecan pie. See my simple recipe for Caramel Whipped Cream. (Also coming very soon.)


Holiday Pumpkin Pie From Scratch

by The Goldilocks Kitchen
Prep Time: 45 minutes
Cook Time: 35 to 45 minutes, cool 2 hrs.
Keywords: bake dessert Pumpkin Christmas Thanksgiving pie winter
Ingredients (8 -10 Servings)
  • 1 recipe for single-crust pie dough
  • 1 cup heavy cream
  • 1 cup whole milk
  • 3 large eggs plus 2 egg yolks
  • 1 teaspoon vanilla extract
  • 1 (15 oz) can of pumpkin puree
  • 1 cup drained candied yams from a 15 oz can (can substitute
  • regular yams if candied are not available)
  • 3/4 cup of sugar
  • 1/4 cup maple syrup
  • 2 teaspoons minced or grated fresh ginger
  • 1 teaspoon salt
  • 1/2 teaspoon ground cinnamon
  • 1/4 teaspoon ground nutmeg
Instructions
1. Move an oven rack to the lowest position and set oven to 400 degrees. Place a foil-lined rimmed baking sheet on the lowest rack to heat in the oven.
Roll one disc of dough out on a lightly floured (about 2 tablespoons) work surface to approximately 12 inches in diameter. The dough should be about 1/8 thick. (If the dough becomes soft and sticky return it to the fridge to firm up again.) Roll the dough around a rolling pin and unroll it over a 9 inch pie plate. There should be at least 1 inch overhanging on all sides. Gently lift the edges and lower the dough down against the sides of the pan.
2. Trim the overhanging dough to 1/2 inch overhang, then fold it underneath itself so the edge of the dough is flush with the edge of the pie plate. Flute the edges with your fingers, cover the whole thing with plastic wrap and refrigerate until firm, about 30 minutes.
3. Remove the pie shell from the fridge and poke a few holes around the bottom of the dough using a fork. Line the chilled dough with heavy duty aluminum foil and fold the edges over the crust. Fill the pie plate with weights or pennies and place the pie on the preheated baking sheet in the oven. Bake for 15 minutes (25 if using my Foolproof Pie Dough recipe). Remove the weights and foil from the pie shell and continue to bake until golden brown and crisp, 5 to 10 minutes more. Remove the pie plate and baking sheet from the oven. Leave the oven on.
4. While you're baking the pie shell, Whisk the cream, milk, eggs, egg yolks, and vanilla together in a mixing bowl. In a large pot, combine the pumpkin puree, yams, sugar, maple syrup, ginger, salt, cinnamon and nutmeg. Simmer the mixture (more like sputter), mixing constantly and mashing the yams, for about 10 to 15 minutes. It should be thick and shiny.
5. Remove the pot from heat and whisk in the egg milk mixture well. Strain the mixture through a fine mesh strainer set over a large mixing bowl, pressing on the solids to extract as much liquid as possible. Pour the strained custard into the warm pie shell. Keeping the rimed baking sheet under the pie, place the pie into the oven. Bake for 10 minutes.
6. Reduce the heat to 300 degrees, carefully rotate the baking sheet, and bake for an additional 20 to 35 minutes longer. The edges of the pie should be set, and the middle 2 inches jiggly. The internal temp at the center should reach 175 degrees on an instant read thermometer. Cool the pie on a wire rack for 2 to 3 hours at room temperature. Cut and Serve.
Powered by Recipage

Thursday, November 7, 2013

Elva's Ham Chowder


You'll enjoy creating this recipe at home because it's simple and full of flavor. Your taste buds and tummy will thank you for making Elva's Ham Chowder tonight. Mmm, Mmm, Mmm! I often her my husband singing the old Irish tune "Who threw the overalls in Mrs. Murphy's chowder" when I whip up a pot of this soup :0)


Another one of my husbands' grandmothers' recipes, it easily doubles to feed a crowd. You probably have most of what you need to make it in your pantry already. Cubed ham is sauteed with onion and celery to add flavor and soften the vegetables. Then you just add canned corn, cream of chicken soup, cream of potato soup, and evaporated milk. One package of cream cheese is melted into the mixture, and you've got a thick and hearty soup that satisfies your appetite.


If you desire, you can thin the soup a bit with milk. I personally like it thick and hearty. Do not add any salt to this, the ham and soups impart enough salty flavor on their own. If it's too salty for your liking, adding milk can also help bring the saltiness down a bit. I love adding freshly ground pepper to a hot bowl.


Elva's Ham Chowder

by The Goldilocks Kitchen
Prep Time: 10 minutes
Cook Time: 25 minutes
Ingredients (6 to 8 servings)
  • 1 pound chunk of Ham, cubed into 1/4 inch pieces
  • 1/2 onion, chopped fine
  • 1 cup of celery chopped fine
  • 2 tablespoons unsalted butter
  • 2 cans of cream of chicken soup
  • 2 cans of cream of potato soup
  • 1 12 oz. can of evaporated milk
  • 1 8 oz. package of cream cheese
  • 1 can whole kernel corn in water
  • whole milk
  • pepper
Instructions
1. In a large sauce pan or dutch oven over medium high heat, saute the ham, onion and celery until vegetables are softened, about 5 to 7 minutes.
2.Then add in the cream soups, evaporated milk, cream cheese and corn with water. Stir constantly to mix together and melt the cream cheese. Remove from heat just before boiling. Add a little milk to thin the soup if it's to thick for your liking. Sprinkle with pepper and serve.
Powered by Recipage

Wednesday, November 6, 2013

Butterflied Turkey with Cranberry Molasses Glaze


Are you in charge of cooking the Holiday turkey this year? If you really want to impress the family and friends around the table, this turkey recipe is a sure hit! The unique approach of butterflying your bird presents more surface area for the cranberry molasses glaze to stick to. Roasted at a low temperature until fully cooked results in a beautiful, moist interior. A blast of heat towards the end sets the glaze and crisps the skin. So if you're ready to depart from the ordinary turkey and serve an extraordinary bird , read on!

Can you see the shine in the white meat? This turkey is moist!

In order to create this recipe, you'll need a good sharp pair of kitchen scissors, a wooden skewer, and a roasting pan. You'll use the scissors to cut out the backbone of the bird. Then, flipping it over you'll press down hard on the breast bone to flatten the turkey, like this:


Cut right along the side of the backbone, through the ribs.

Cut up the other side in the same fashion.

This is what your turkey should look like with the
spine removed.


I usually have my husband do this part because it helps him feel strong and manly. :0)


Now flip it over and push hard!

The end result; a butterflied turkey :0)


Now that your bird is successfully butterflied, poking holes in the breast and thigh meat speeds up fat rendering, leading to crispier skin. Rubbing Kosher salt under the skin seasons the meat and helps the meat cook up moist. It's really important that the skin is as dry as possible to encourage browning, so you'll blot as much moisture off as you can with paper towels. Applying a dry rub on the outside skin of the turkey consisting of Kosher salt, pepper and baking powder adds more flavor and helps dry out the skin further so it will turn out crispy brown instead of soggy and limp.


If your roasting pan doesn't have a rack that can be inverted and still fit in the pan, (see picture at left) no problem! Take the rack out and place onion halves under each breast and thigh to elevate the bird from the bottom of the pan. (You'll need two onions each cut in half. ) Tie the legs together with kitchen twine and tuck the wing tips under the breast, as shown. Now you're ready to roast your turkey!

Fully cooked AND glazed turkey. Isn't it a beauty?


When the turkey is done, it's important to let it rest. As the meat cools, the juices 'settle' or collect back into the muscle tissue, creating great moist meat. While it's resting, you can move on to creating your glaze. Waiting to apply the glaze after you've fully cooked the turkey allows the skin to crisp up first. Blasting it with high heat will concentrate and thicken the three coats of glaze.


Cranberries cooked in molasses, thinned with apple cider, apple cider vinegar, fresh ginger, and Dijon mustard are reduced on the stove top to create a beautiful and flavorful glaze. Plus, you can use what's left to create a lovely drizzling sauce to pass around the table.

If you are feeding a crowd, and are cooking a larger bird, you'll want to adjust the recipe for the size of the bird. This recipe is written for a medium-smallish turkey. Either 1 and 1/2 the ingredients or double them to ensure that you have enough glaze for your larger turkey and that it is properly seasoned.


Butterflied Turkey with Cranberry Molasses Glaze

by The Goldilocks Kitchen
Prep Time: 1 hour and 30 minutes
Cook Time: 5 hours total 
Keywords: roast entree turkey Thanksgiving Christmas American
Ingredients (10 to 12)
    Turkey
    • 1 (12 - 14 pound) turkey, giblets and neck removed
    • 2 teaspoons Kosher salt
    • 2 tablespoons Kosher salt
    • 2 teaspoons ground black pepper
    • 2 teaspoons baking powder
    • optional: 2 large onions, peeled and halved (see blog post)
    Glaze
    • 3 cups of apple cider
    • 1 cup fresh or frozen cranberries
    • 1/2 cup light or mild molasses
    • 1/2 cup apple cider vinegar
    • 1 tablespoon grated fresh ginger
    • 2 tablespoons unsalted butter
    Instructions
    1. Following the instructions in the blog post, butterfly the turkey by cutting adjacent to each side of the backbone with sharp kitchen scissors and removing it completely. Flip the turkey over and using the heel of both hands, push down until the turkey is laying flat. (You will hear bones cracking.)
    2. With a wooden skewer, poke 15 to 20 holes in the breast halves and thighs. Flip the bird over and rub the bone side of the turkey with 2 teaspoons of Kosher salt and 1 teaspoon of pepper. Flip turkey skin side up and separate the skin from the meet using the handle of a wooden spoon or your fingers. Rub 1 tablespoon of salt evenly under the skin. Tuck the wing tips under the breast. Push the legs up to rest on the lower portion of the breast and tie the bones together with kitchen twine. Combine the remaining tablespoon of salt, remaining tablespoon of pepper and baking powder in a small bowl. With a wad of paper towels, blot the skin dry. Rub the entire surface of the skin evenly with the baking powder mixture. Place the turkey in your roasting pan, either on the inverted rack or onions and allow the bird to stand at room temperature for about an hour. About 10 minutes before the end, preheat your oven to 275 and move an oven rack to the lower-middle position.
    3. Roast the turkey until an instant read thermometer registers 160 degrees inserted in the thickest part of the breast, and 175 degrees in the thickest part of the thigh, 2 and 1/2 to 3 hours. Remove the bird from the oven, strain any liquid in the bottom of the pan into a fat separator, and let rest for at least 30 minutes.
    4. While the turkey rests, move on to cooking the glaze by combining all ingredients *except butter* in a large saucepan. Bring to a boil over medium high heat. Cook, stirring occasionally, until reduced to 1 and 1/2 cups, about thirty minutes. You'll know it's done when it leaves a thin film coating on your spoon. Strain the mixture through a fine-mesh strainer into a 2 cup measuring cup. Press on the solids in the strainer to extract as much glaze as you can, and toss the solids that are left. Transfer 2/3 cup of glaze to a small sauce pan and set aside. Now, set your oven temperature to 450 degrees.
    5. Brush the turkey with approximately one-third of the glaze in the measuring cup. If it's quickly dripping off the turkey, it's to thin. (If this happens, pour it into a small pot and boil it until it thickens slightly.) It should stick to the skin fairly well without much dripping off. Place in the hot oven for about 6-7 minutes. Pull it out and put another coat of glaze on. Roast again for 6 to 7 minutes. Pull the turkey out and place a final third coat of glaze over it and roast for 7 to 10 minutes, or until the skin is evenly browned and crispy. Transfer the turkey to a cutting board and let it rest for 20 minutes. (Now discard the onions if you used them.)
    6. While it's resting, pour the drippings into the sauce pan with the reserved glaze, discarding any remaining fat. Bring the mixture to a boil over medium high heat and cook until it thickens slightly, about 10 minutes. Remove the pan and *finally* whisk in the butter. Carve the turkey and serve, passing the sauce with it.
    Powered by Recipage
    09 10